
Beach Bucket
21
Have Made It
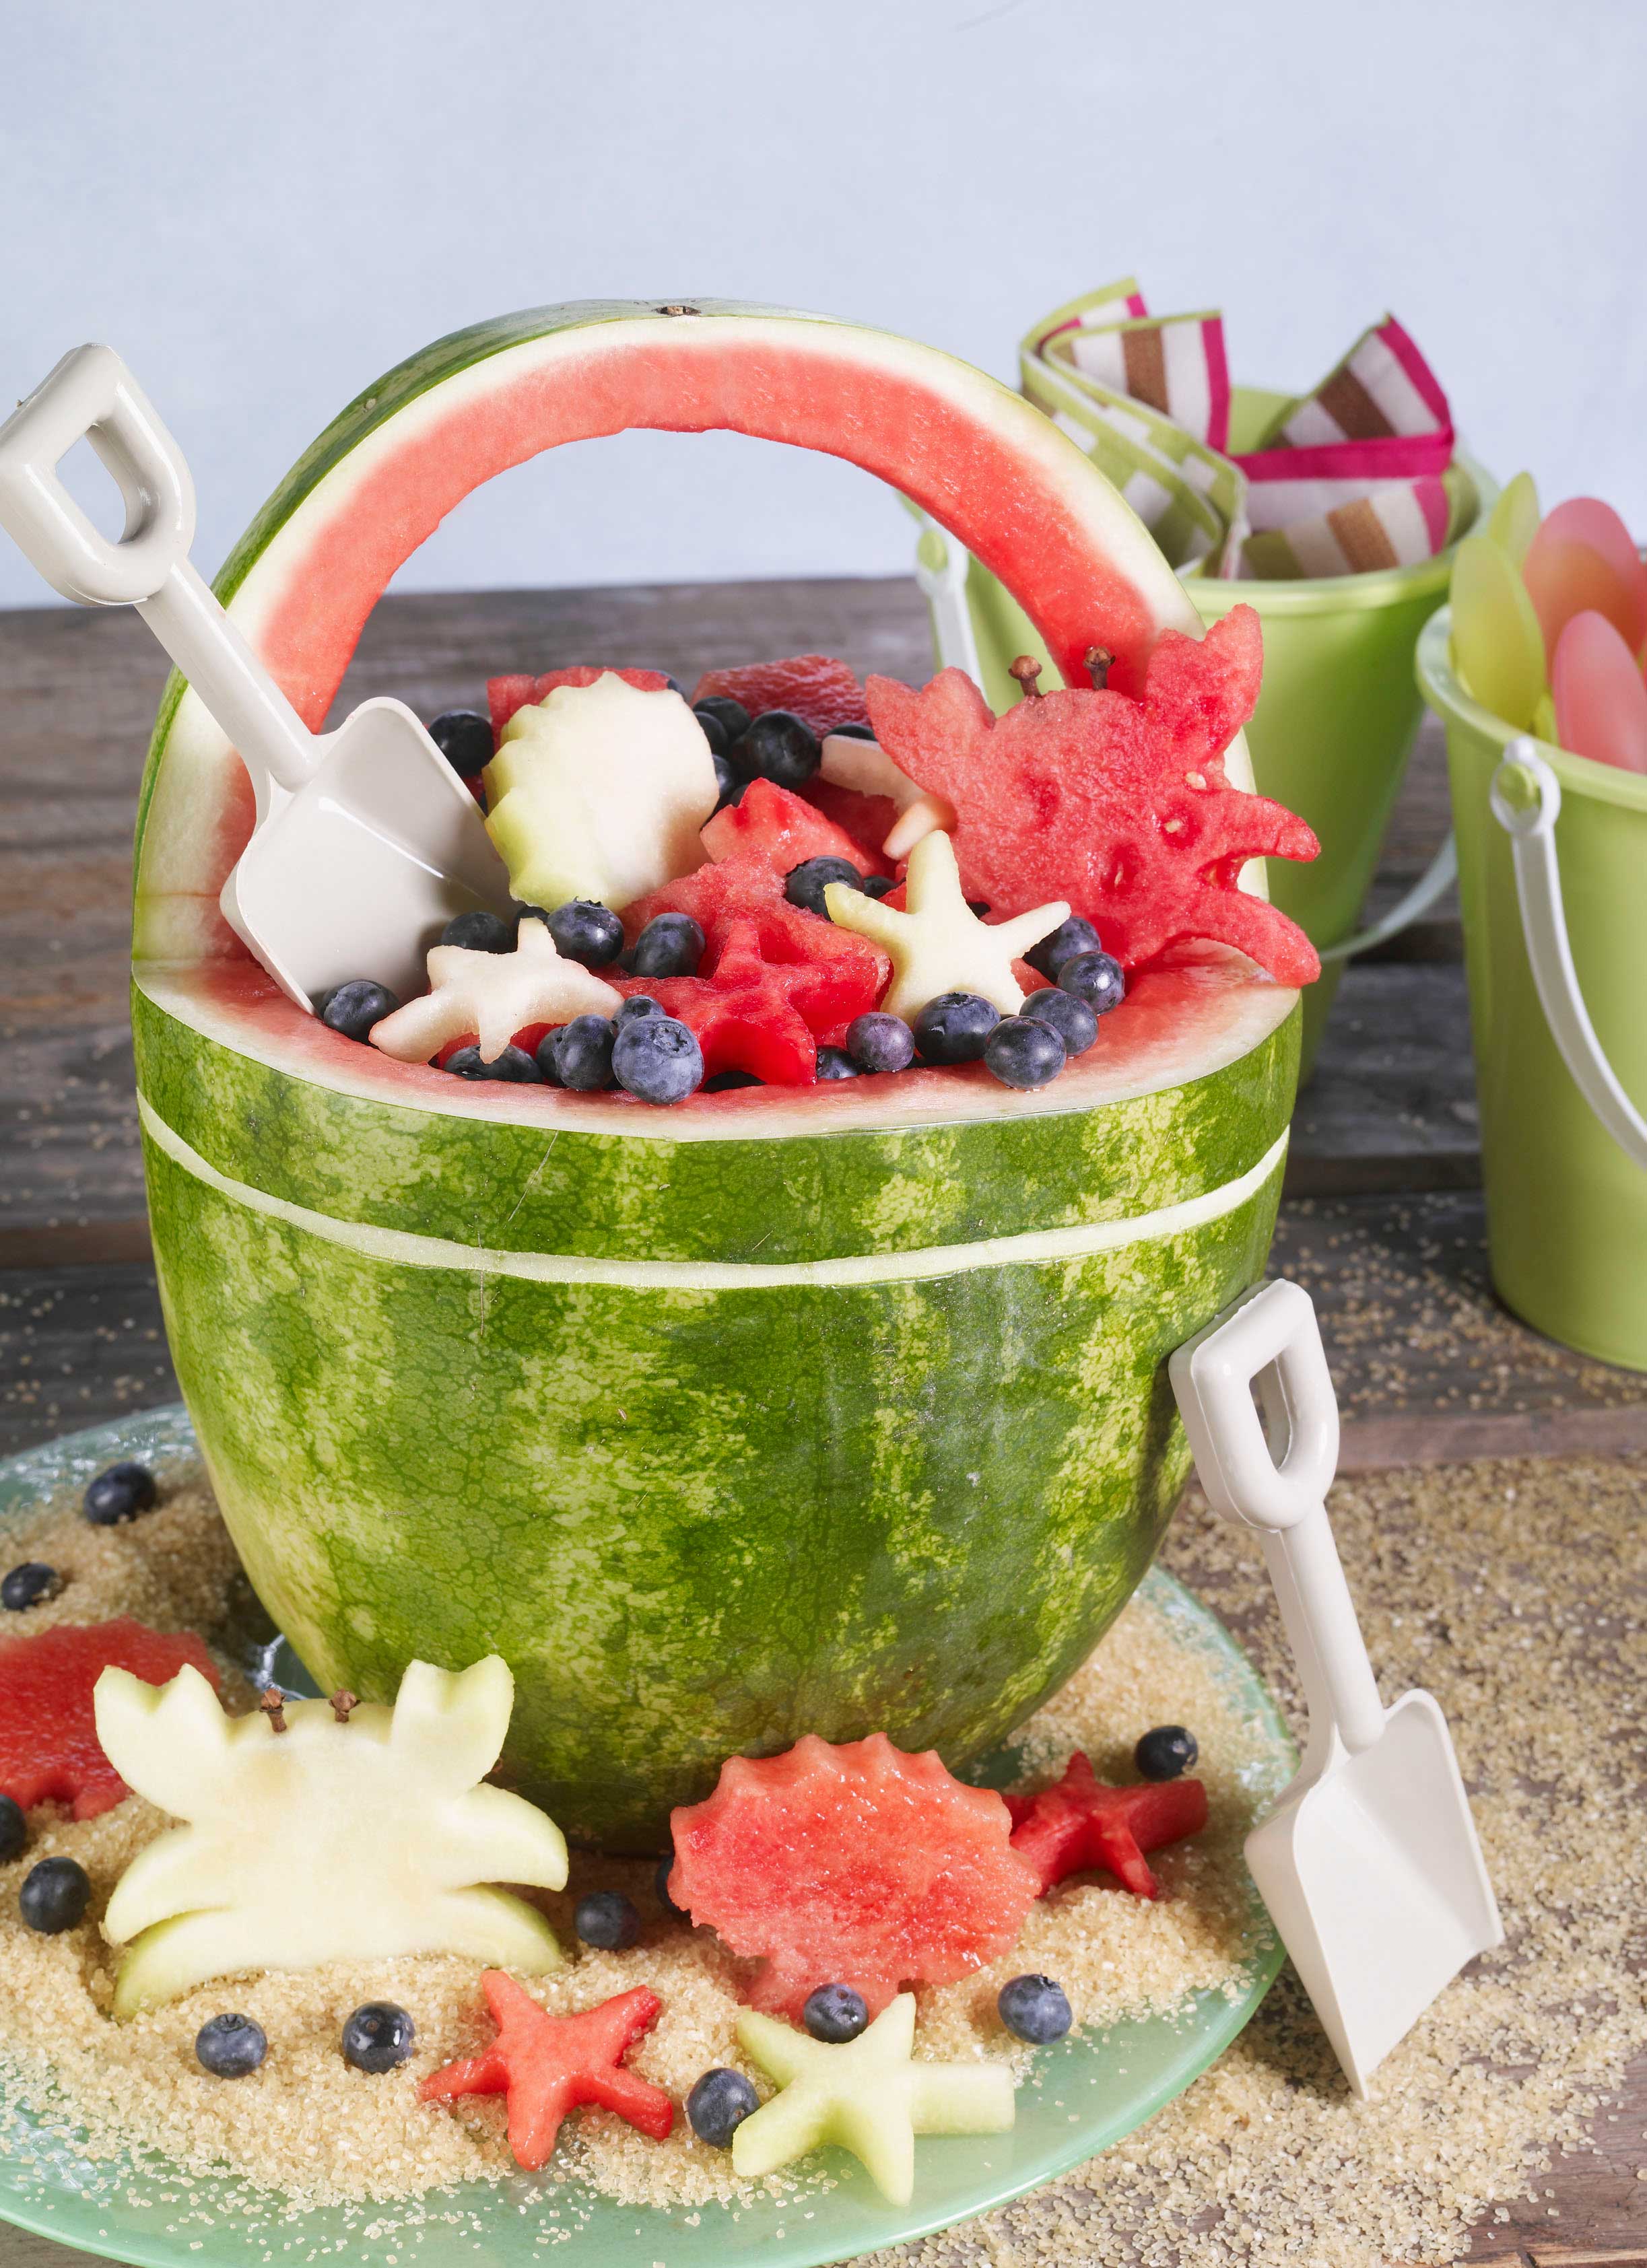
This summer bucket full of delicious fun will be a hit anywhere!
Materials
Supplies
Tools
Instructions
- Read through the directions before you start.
- Drain cut watermelon and other fruit before placing it in the carving.
- When removing excess flesh try to leave it in big pieces – easier for making melon balls or cubes.
- Use a green dry erase marker – wipe off excess marker after making cuts.
- Wash the watermelon under cool running water and pat dry.
- Placing the watermelon on its side cut off the bottom end ¼” – ½” so that it can stand flat on its end. Be careful not to cut too deep into the white part of the rind – this would allow liquid to leak from the bottom of the carving.
- Stand the watermelon on the cut end. With your dry erase marker, draw a line about 1/3 of the way down from the top, around the whole watermelon.
- Pick a point on the line and find the corresponding point on the exact opposite side of the watermelon. From those points measure 1 inch to the right and to the left. Connect those points by drawing two parallel lines across the top forming the shape of the handle.
- Use the paring knife to cut along the lines, being careful to not break or crack the handle. For best results, hold the paring knife like a pen, but only cut half way into the rind. Once you complete that first cut all the way around, then go back and cut the rest of the way through the rind. Doing the cut in two steps will ensure a cleaner line and smoother cuts.
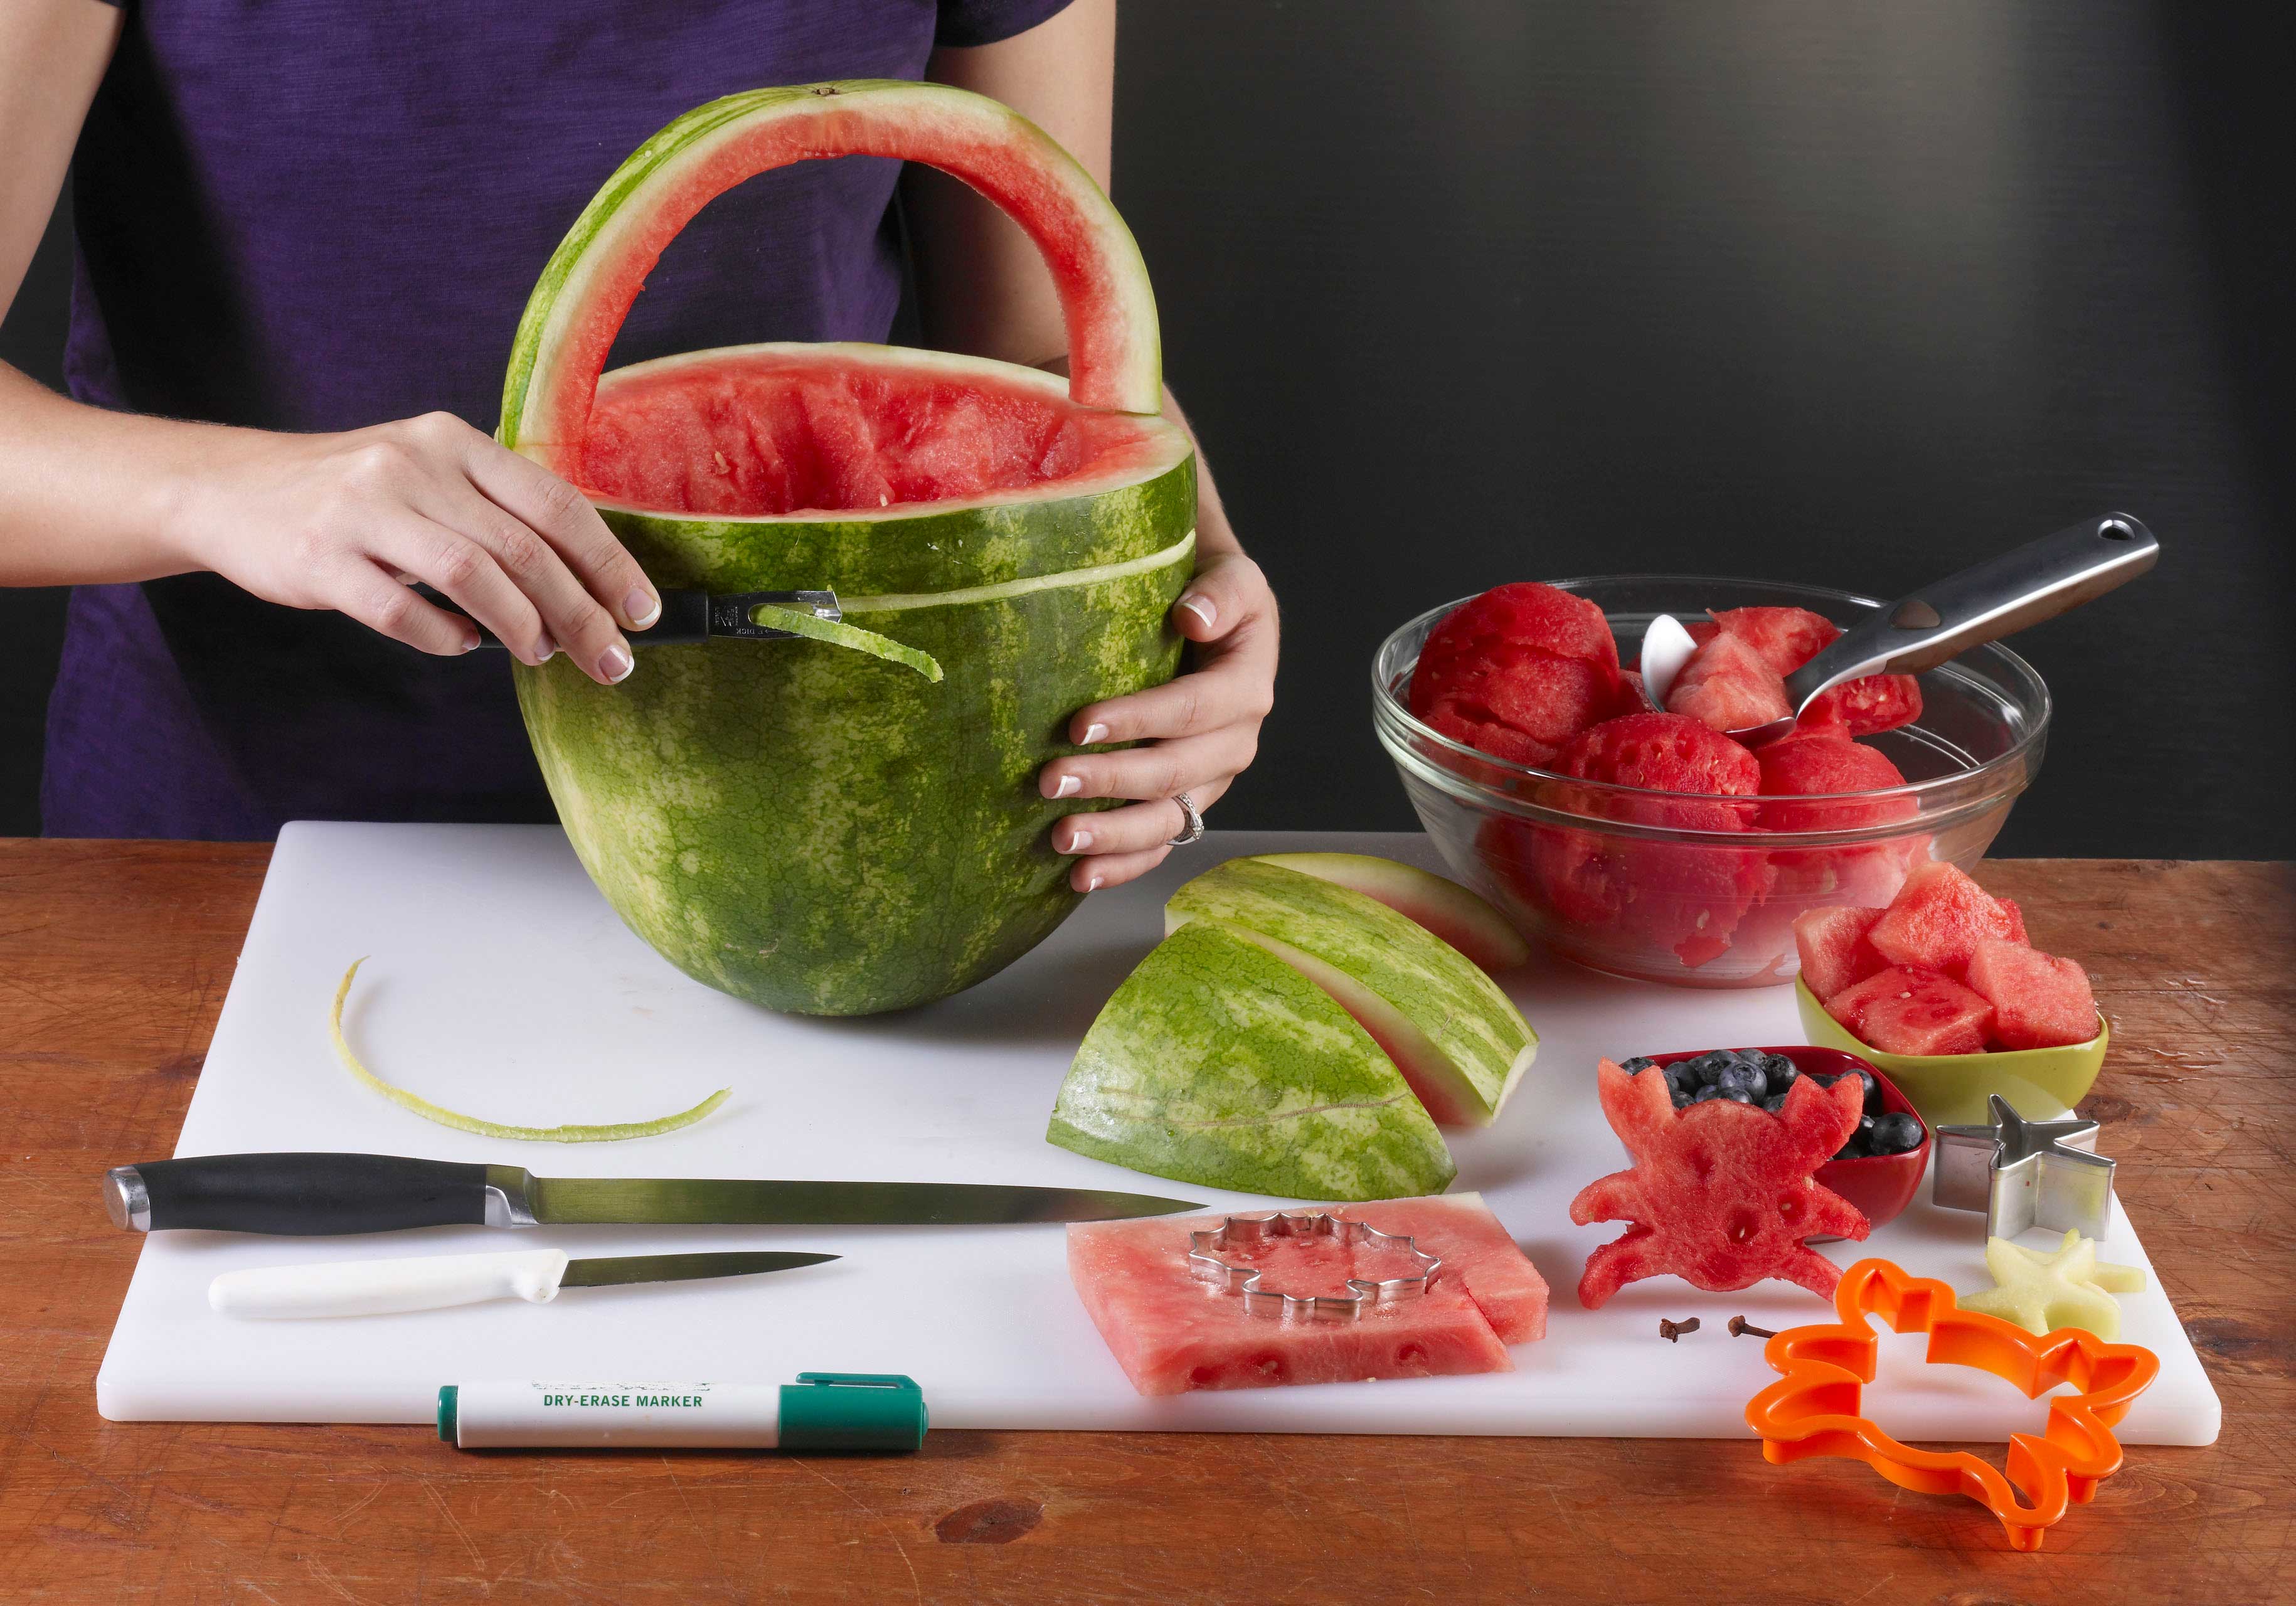
- Carefully remove the trimmed rind and flesh. Try to remove as much flesh as possible in large portions that can later be sliced and used with the cookie cutters.
- Scoop out all of the remaining flesh from the base, trying to leave as much flesh intact. Remove it in larger pieces that can be used for making watermelon balls or bite-sized chunks.
- Take your channel knife and carve a channel about 1”-2” from the top edge, creating the rim of the bucket.
- Take the large removed pieces and trim off rind. From flesh cut rectangles about ½ inch thick. Using beach-theme cookie cutters cut shapes from the watermelon. To create light colored shapes you can use slices of honeydew melons, or cut decorative pieces from the white part of the watermelon rind. Set aside and drain on paper towel.
- With the remaining fruit, make either cubes or balls and drain. Toss with other cut fruit and berries and fill bucket.
- Decorate top of bucket with cut watermelon shapes and new, clean toys and shovels. Use light colored cake mix to resemble sand.
Leave a Review